Payment terminals
Below is explained how to create and use interfaces to payment terminals in our system in general. Payplaza is taken as an example.
Regarding SumUp, the following additional/alternative points must be observed/the following steps must be followed:
- When creating a SumUp interface in Admin, less data needs to be entered/stored than when creating a Payplaza interface:
- In order to use SumUp, not only the physical terminal is needed, but also a mobile device with the "SumUP card payments" app. So SumUp can also be used only through mobile devices.
- On the SumUp website at https://buy.sumup.com/en-us/signup/create-account (or alternatively in the app), one must first create an account with SumUp and enter all the necessary data during this process or later in the profile. For this, the instructions and FAQ's directly from SumUp can be of help, e.g.: https://support.sumup.com/hc/en-us --> https://support.sumup.com/hc/en-us/sections/360003486980-Account-setup + https://support.sumup.com/hc/en-us/sections/115002420267-My-account . A login via the browser is then possible via e.g. https://auth.sumup.com/flows/login .
- It is recommended to always name the interfaces individually in the admin.
- It is recommended to always create only one interface per device and to always (only) assign this interface to a specific cash register (i.e. also the payment terminals themselves) in order to avoid overlaps and thus potential problems with simultaneous use, or at least to prevent them - however, this is not a prerequisite.
- If you use more than one terminal and therefore create more than one interface in our system, you can always use the same access data. So you only need one SumUp account and you don't have to create separate OAuth access data for each terminal.
- For specific information directly about SumUp and e.g. also the appearance of the terminal you should visit sumup.com .
- The first time you make a SumUp payment in Checkout, you will be redirected to a SumUp page where you must give SIDES one-time access to certain SumUp profile data or access to certain features and/or you must log in with your SumUp account data either once or at most every 6 months:
- Cancellations should preferably always be done through our system (first) and not through the SumUp app or similar - the cancellation will then be transferred to SumUp.
If you cancel via SumUp (in the app), the money will be transferred back, but the cancellation will not be transferred to our system, so you have to "re-cancel" the order separately in our system.
The cancellation does not necessarily have to be made again via the payment terminal.
Payplaza Setup
Please contact Payplaza to arrange the migration of your terminal. You will receive the ECR-ID (terminal ID) (format: SMP_xxxxxxxx_xx) from Payplaza. A certificate does not need to be uploaded, as it is stored globally.
Please make sure that the corresponding payment type "EC-Terminal" or "EC-Terminal (card payment)" has been activated for the store. If the payment method is missing completely, it must be activated by us beforehand.
As soon as the migration of the terminal on the part of Payplaza is completed, you can use the terminal in the checkout. Until then, the following settings should be made in the SIDES system.
1. Set up the printer
There must be a printer that can print payment receipts from terminal payments. To set up a printer, please take the following steps:
-Go to the Hardware > Printer menu item within the Admin.
-select the appropriate store
-Add printer and enter necessary data (see SOCP)
-at "what should this printer print?" Payment terminal receipt: select "Default: Payment terminal receipt".
If the printer is already set up, go to "Edit" here and perform only the last step to select the appropriate print template.
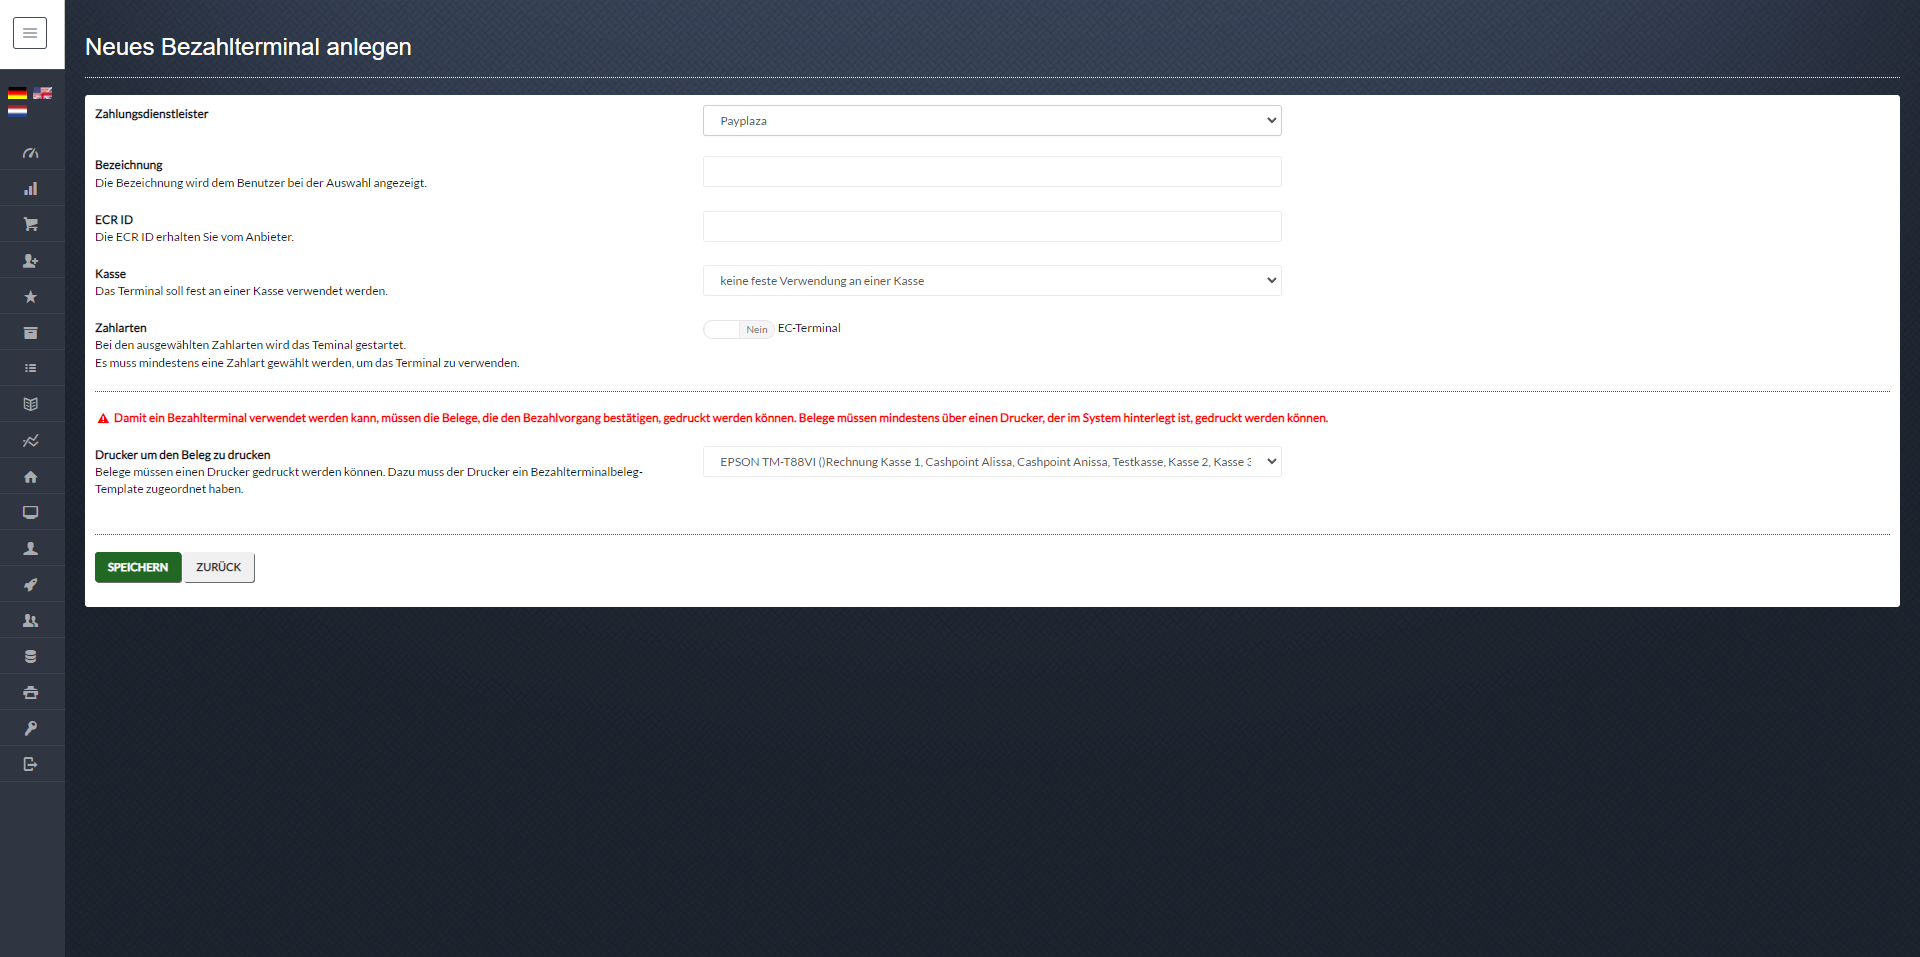
2. Create the payment terminal
In addition to the printer, the payment terminal must also be integrated into the system. To set up a terminal, please do the following steps:
-Go to the menu item Hardware > Payment Terminals within the Admin.
-select the appropriate store
-Add the terminal and enter the necessary data.
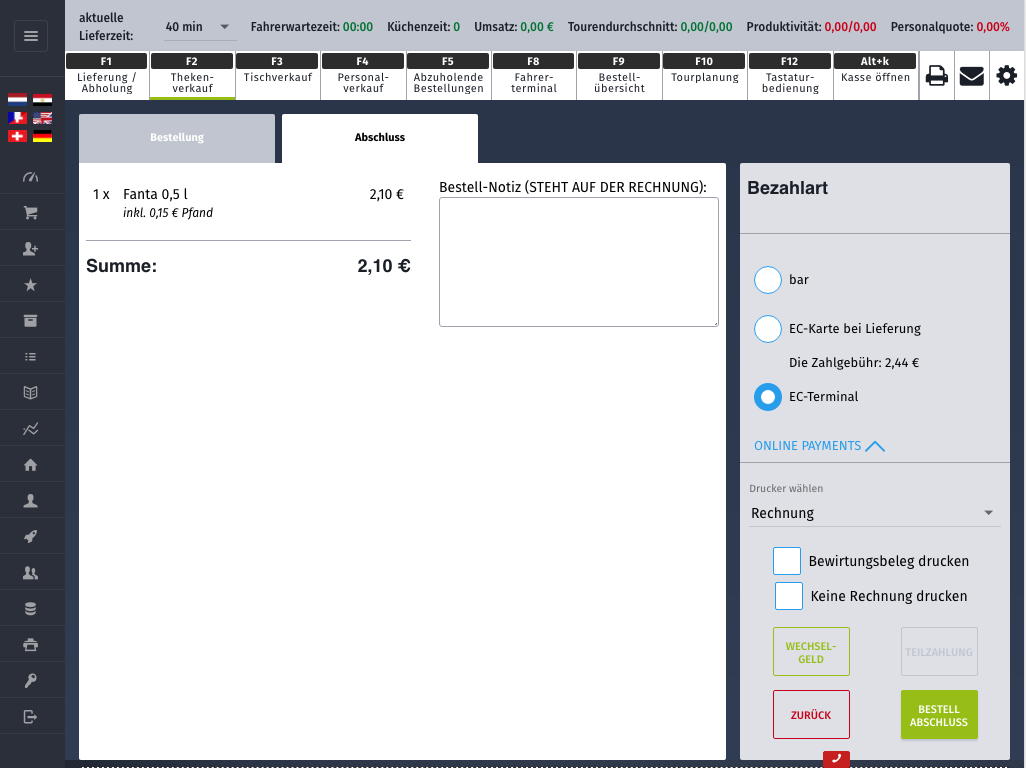
3. Use terminal in checkout
Select EC-Terminal as payment method.
(The payment method "EC-Terminal" (and therefore SumUp among others) is only available in the POS in the "POS" for counter sales, table sales and staff sales, as well as in the "MOBILE POS").
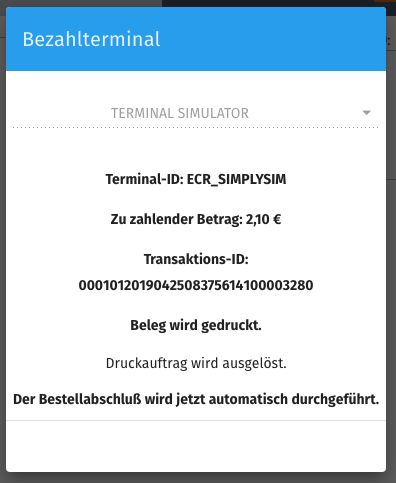
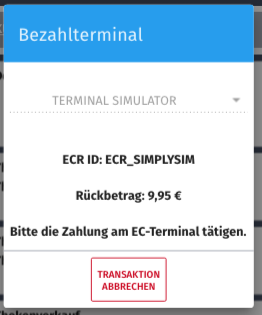
Click on "CHECKOUT". The following window will appear. Please check again the amount that appears there and click on "START TRANSACTION".
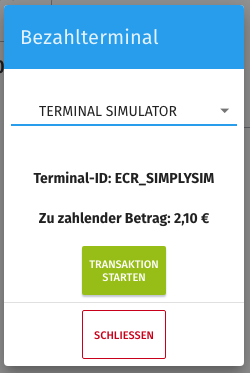
After that the following window will appear. Please follow the instructions on the terminal.
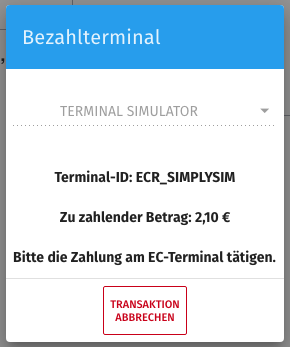
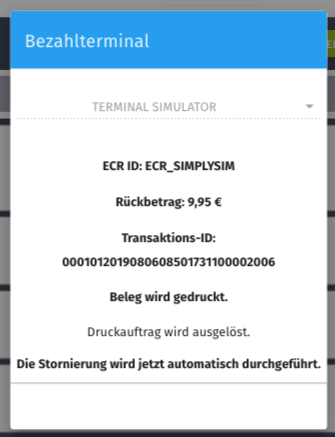
If all the data has been entered on the terminal, the print order will be automatically triggered and the order will be completed.
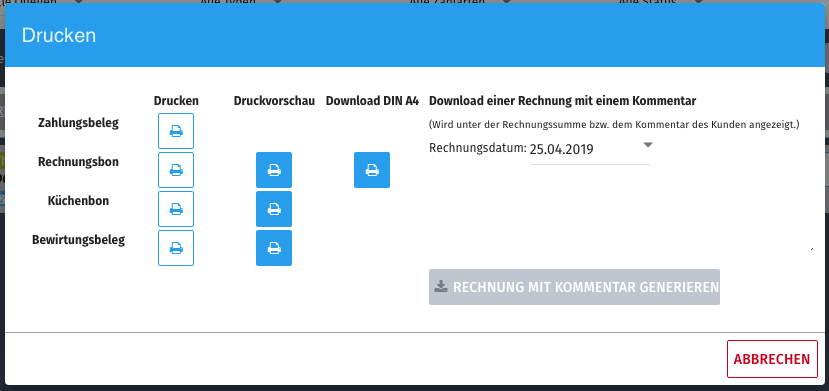
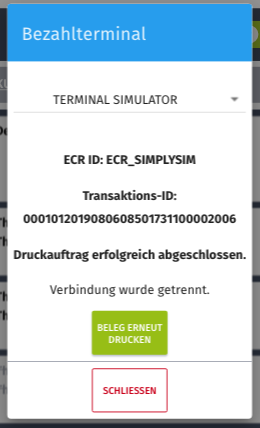
Afterwards you can close the window or print a receipt again.
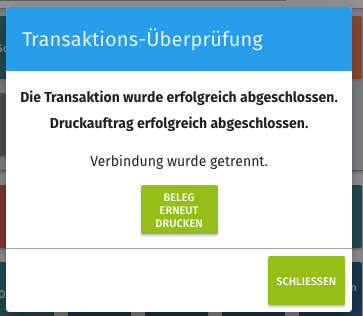
The last payment made and the related receipt can be printed again within the checkout using the printer button in the upper right corner.

If you do not want to print a receipt again at this time, you can repeat this at any time from the order view.
Cancellations
Cancellation of orders paid via EC terminal can be done via the order list. This only works via the "new" version of the order list.
Find the order you want to cancel and click on the red X to cancel the order, just like for other orders. You will then receive the following message:
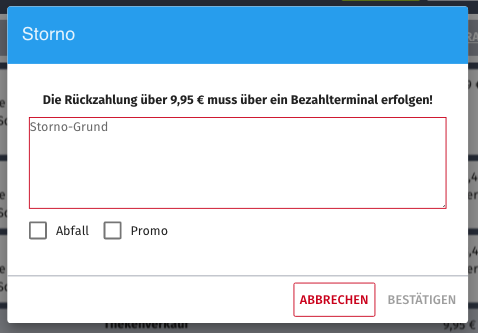
Enter a reason for cancellation and then click on confirm. Then select the appropriate terminal through which the cancellation is to be completed.

If the terminal and the amount to be refunded are correct, click on "START TRANSACTION". Then follow the instructions on the terminal.
If all the instructions on the terminal have been followed, a corresponding cancellation document will be printed and the cancellation will be performed automatically.
If the cancellation receipt was printed successfully, the transaction is completed successfully and the connection is disconnected. If the customer also wants a copy of the cancellation receipt, a copy of the receipt can be printed again here.
Related Articles
Payment type - set up PayPal V2
1. Set up PayPal In order to use PayPal in the webshop, it is necessary to set up the PayPal payment method in the Admin first. 1.1 Go to Admin > Store > Stores > Merchant Accounts. 1.2 Select "Add a Merchant Account". 1.3 Select "PayPal", add a ...Tax-free payment of tips to employees
To improve usability, we have revised the navigation structure, which will be published soon. As part of this update, some terms have been adjusted and navigation items reorganized. This entry already uses the updated navigation structure and ...Activate Twint payment method in the webshop (for Switzerland)
What In order for the customer to be able to pay with Twint in the webshop in Switzerland, the payment method must first be activated. Where Admin: Store > Stores > Edit > Payment type > Twint. Activate Twint payment type The Twint payment type must ...SIDES Pay Setup
Create SIDES Pay Merchant Account / https://support.simplydelivery.de/portal/en/kb/articles/merchant-accounts-en Connect SIDES Pay Terminal in Admin + Configure SIDES Pay Terminal in Windows / ...Recommendation for setting up the payment terminal for the S22+/S30 self-order terminal (SOT)
What Recommendations for setting up the Stripe Reader S700 payment terminal for the S22+/S30 self-order terminal (SOT). Thank you for choosing the S22+/S30 SOT (Self-Ordering Terminal) for your business! If you also order the Stripe Reader S700 ...